
Buying guide
How to Plan Over-the-Toilet Storage Without Crowding a Small Bathroom
Measure fixtures, wall conditions, reach, and cleaning access before using the space above a toilet.
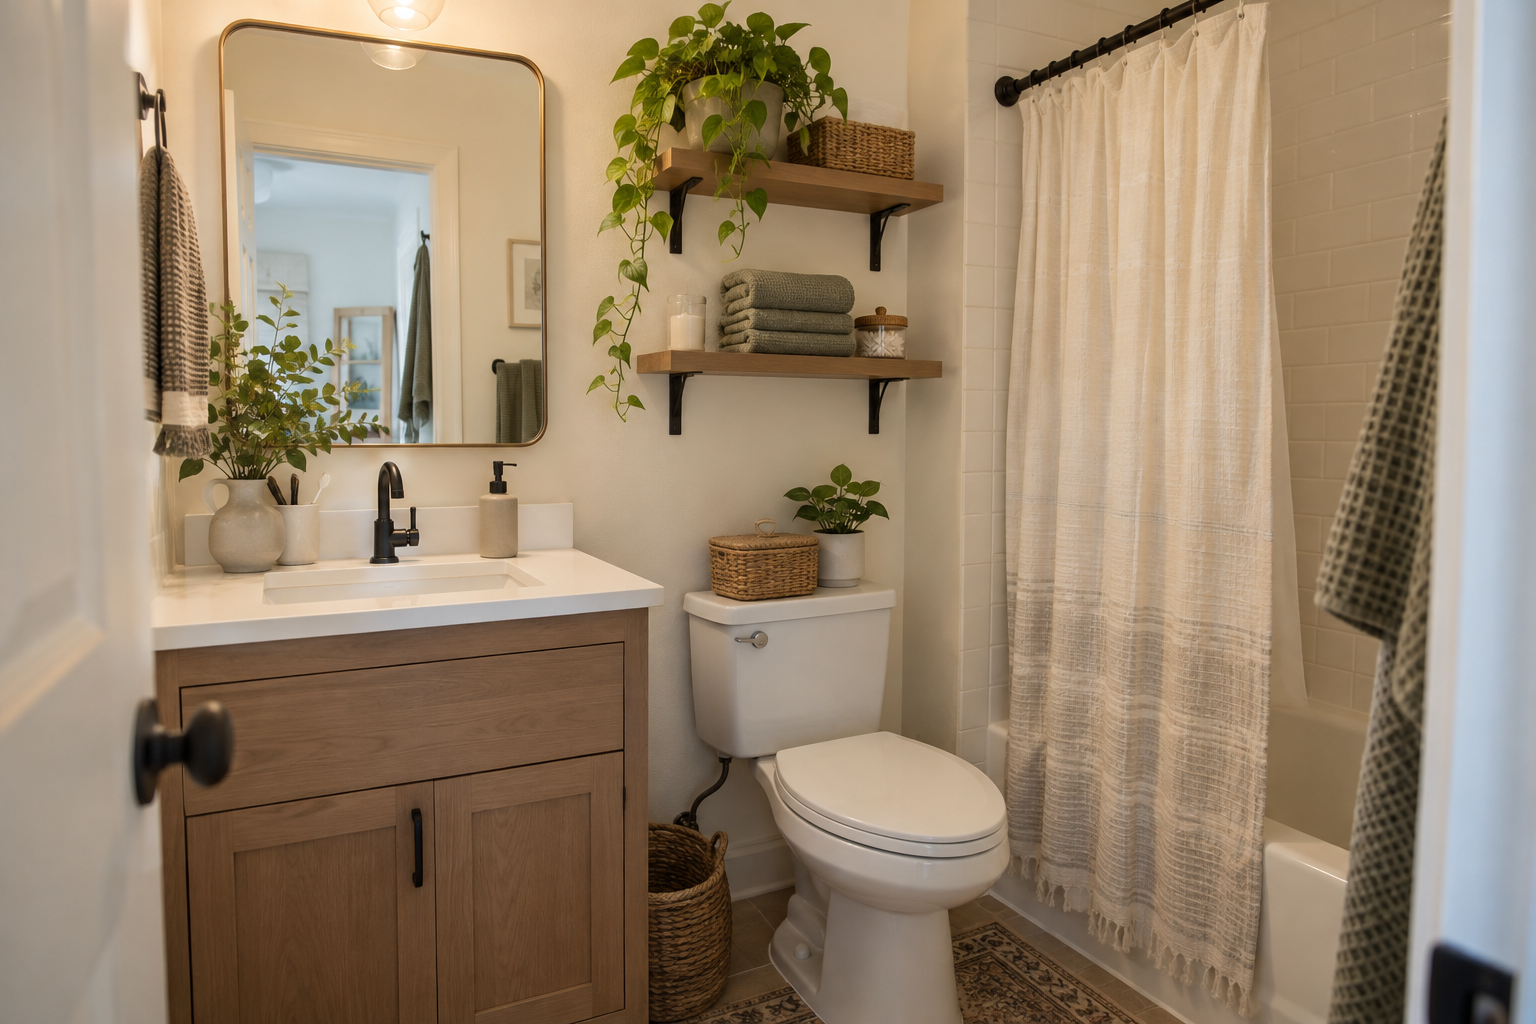
At a glance
What this guide covers
Measure fixtures, wall conditions, reach, and cleaning access before using the space above a toilet.
The wall above a toilet can provide useful storage, but only when the unit clears the tank and controls, remains accessible for cleaning, and suits the wall or floor conditions. Measure the real fixture area before deciding between a freestanding rack and wall-mounted shelves.
Start with the toilet, not the shelf
Measure floor width beside the toilet, tank width and height, the highest point of the lid when open, flush control clearance, and the distance to nearby walls or counters. Keep access to plumbing and any shutoff valve.
Decide what belongs above the toilet
Use the area for lightweight, contained categories such as spare towels or unopened paper goods. Avoid loose small objects that can fall, and do not store anything where moisture or contamination would make the location unsuitable.
Compare freestanding and wall-mounted formats
A freestanding rack uses floor contact and must fit around the toilet. A wall-mounted shelf keeps the floor clearer but depends on the wall construction, fasteners, installation instructions, and any lease restrictions. “No drilling” or adhesive language should never be assumed damage-free on every surface.
Check reach and head clearance
Place frequently used items where they can be reached without stretching over the fixture. Shelves should not project into the space used when sitting or standing. Test the proposed depth with painter’s tape or a cardboard outline.
Keep cleaning access
Leave room to wipe the tank, wall, floor, and shelving. A unit that technically fits but traps dust or blocks the toilet lid will become frustrating. Keep the lowest stored items above splash and cleaning zones.
Use approved products only as measurement references
The library includes the Kitsure over-toilet rack (SK-BAT-003), a four-tier freestanding rack (SK-BAT-005), and QEEIG wall-mounted shelves (SK-BAT-009). They represent different installation formats. Confirm current dimensions, materials, included hardware, load guidance, and installation requirements before choosing.
Measure the complete fixture zone
Record the floor width at the base, the tank width and height, the distance from the wall, and the highest point reached by the lid. Include the flush handle or button, water line, shutoff valve, supply hose, base trim, and any nearby outlet or vent. Measurements at the floor can differ from measurements above the tank.
Then note the narrowest passage beside the toilet and the route used for cleaning. A freestanding unit may fit around the tank but still project into the walkway or prevent access to the valve. Keep the sketch with you while comparing listings so similar-looking products are measured against the same limits.
Mark shelf depth before choosing a unit
Use painter’s tape on the side wall or a cardboard outline to represent the proposed shelf depth and height. Sit, stand, reach for the flush control, and open any nearby cabinet or door. The shelf should not enter comfortable head or shoulder space or create an edge that is easy to hit.
Test the outline with the intended containers, not only empty space. A basket can project beyond a shallow shelf, while rolled towels may require more depth than folded ones. The final usable depth is the smaller of the shelf dimension and the clearance that remains comfortable.
Choose freestanding storage when the floor supports it
A freestanding rack such as SK-BAT-003 or SK-BAT-005 may avoid wall installation, but it still requires a level, dry, correctly sized footprint. Check toilet width, tank clearance, baseboards, plumbing, and whether the unit can be assembled in the room. Follow stability and anchoring instructions where provided.
Freestanding does not automatically mean renter-friendly or tip-resistant. Some units may require securing to the wall. Verify the current listing and manual, keep heavier items low when permitted, and avoid loading a narrow unit in a way that changes its stability.
Choose wall shelves only for a suitable wall
Wall-mounted shelves such as SK-BAT-009 preserve floor access but depend on wall construction, fasteners, hidden services, installation skill, and the stated load. Do not assume supplied hardware suits every wall. When the construction or location of pipes and wiring is uncertain, obtain appropriate help.
Renters should review lease conditions before drilling or using adhesives. “Removable” and “no damage” claims depend on the surface, preparation, load, time, humidity, and removal method. A different storage location is preferable when permission or compatibility is unclear.
Assign lightweight categories to the upper levels
Good candidates may include spare toilet paper, clean hand towels, or lightweight backup toiletries whose labels permit bathroom storage. Keep daily items within comfortable reach and contain small objects so they cannot roll or fall. Avoid glass, unstable stacks, and heavy objects above the fixture.
Do not store medicines, food, electrical items, or products whose instructions make a humid bathroom unsuitable. Household needs and product labels take priority over a decorative arrangement. Keep child or pet access requirements in mind when assigning any category.
Preserve plumbing and maintenance access
The shutoff valve, supply connection, tank lid, and floor around the base must remain reachable. A leak or running toilet should be visible rather than hidden behind bins. Choose containers that can be removed independently so a plumber does not need to dismantle the entire storage system.
Leave enough room to wipe the wall, tank, shelves, and floor. If the unit makes ordinary cleaning difficult, dust and moisture will collect in the narrowest gaps. Open maintenance space is useful capacity, not a design failure.
Plan for humidity and ventilation
Bathrooms vary in moisture, airflow, and temperature. Follow product care instructions and choose materials suitable for the actual environment. Do not block exhaust fans, windows, radiators, or air paths. Allow damp towels and cleaning cloths to dry in an appropriate location before placing them in enclosed storage.
Inspect shelves, fasteners, coatings, baskets, and the wall periodically for movement, corrosion, swelling, peeling, or moisture. Stop loading a unit that becomes unstable or damaged. Organization should make changing conditions easier to notice.
Use containers without creating another obstacle
A basket can group lightweight supplies and make a shelf easier to clear, but it also adds height and requires hand clearance. Measure the basket at its widest point, including handles, and make sure it can be lifted without striking the ceiling, shelf above, or nearby wall.
Keep one defined category per container. Deep opaque baskets are better for known backups than for several unrelated products. Labels should face the normal approach and remain readable without reaching over the toilet.
Adapt the plan for shared bathrooms
Give each person a small everyday boundary and keep shared backups separate. Divide the easiest reach area according to routines and accessibility rather than appearance alone. A single mixed basket tends to become difficult to reset because no one knows which items belong there.
Agree on a maximum backup quantity and review it before shopping. Over-toilet storage is most useful when it prevents repeated searching, not when every tier becomes long-term inventory.
When to use another location
Choose a vanity drawer, linen closet, cart, or hallway storage when the toilet area is narrow, the wall is unsuitable, the fixture needs frequent service, or the intended items should remain dry. The empty wall above a toilet does not have to be filled.
A different location can improve access for children, shorter adults, or anyone who should not reach above the fixture. The best small-bathroom plan uses the fewest storage points that support the routine safely.
Review the setup after one week
Notice which items are actually reached for, which remain untouched, and whether anything is repeatedly left on the tank or floor. Remove categories that are awkward to retrieve and relocate backups that occupy daily access. Tighten or inspect components only according to the product instructions.
Repeat the lid, flush, valve, cleaning, and walking tests with the shelves loaded. A system that passed while empty may behave differently when baskets project forward or weight changes its stability. If the room feels tighter or maintenance becomes harder, reduce the load or choose another location rather than forcing the arrangement.
Check that labels remain readable and nothing must be balanced on the tank during retrieval. The completed setup should make the bathroom easier to use on an ordinary busy morning, not only look orderly immediately after installation.
Questions to answer before purchasing
- What are the exact floor, tank, lid, valve, and walkway clearances?
- Does the format require wall attachment, and is that installation permitted?
- Can every shelf be reached and cleaned without leaning unsafely?
- Are the intended items lightweight and suitable for bathroom storage?
- Will the toilet, plumbing, ventilation, and nearby doors remain fully usable?
- Have the current dimensions, materials, hardware, and load instructions been verified?
Compare the completed measurements with the product’s current installation diagram rather than relying on a staged photo. If any required clearance, fastener, wall condition, or service access remains uncertain, postpone the purchase. A smaller shelf or a different storage location is preferable to an installation that crowds the fixture.
A safe planning sequence
- Measure the complete fixture and service clearances.
- List the lightweight items that genuinely need bathroom access.
- Select freestanding or wall-mounted placement based on the room and lease.
- Mark the depth and height temporarily.
- Test reach, lid movement, cleaning, and walking clearance.
- Compare only products that pass those limits.
Common mistakes
- Measuring only the tank width.
- Blocking the flush control, valve, or lid.
- Using shelves too deep for comfortable movement.
- Installing on an unsuitable wall surface.
- Filling every tier with heavy or rarely used items.
Continue with the Small Bathroom hub, explore renter-friendly solutions, review storage planning, browse organization guidance, or see more small-space solutions.
Approved recommendations
Product Picks and Comparison


| Product | Best for | Offer status |
|---|---|---|
| Kitsure Over Toilet Storage Rack | See editorial notes | Active merchant offer |
| Over-The-Toilet Storage Rack | See editorial notes | Active merchant offer |
| QEEIG Bathroom Shelves Over Toilet Wall Mounted (Brown | See editorial notes | Active merchant offer |
Our process
How We Choose Products
We evaluate whether a product addresses the stated small-space problem, review available specifications and merchant information, and prioritize practical fit. We clearly distinguish research and editorial selection from hands-on testing.
 How-To GuideUnder-Sink Kitchen Storage: A Practical Step-by-Step Plan
 Buying GuideBest Shower Caddies for Small Bathrooms